Setup Configuration & Default Behaviour
This chapter describes how to select the configuration and set up the default behavior for scheduling time periods in the planning board.
The contents of this chapter are divided into the following sections:
- Setup Configuration
- Setup Default Behaviour
- Show Dependency Links
- Define Default Service Order Type
- Customize Display for Selection Area
Setup Configuration
This section describes how to set up the configuration for Beyond Scheduler. The configuration specifies which elements (service orders, rental orders, standby times, etc.) can be scheduled for resources in Beyond Scheduler.
BeyondIT can create a customized configuration for you that is adapted to your requirements. For more information about these customizations, please contact us. You can find our contact details in the chapter About Beyond Scheduler.
To select the configuration for Beyond Scheduler, proceed as follows:
- Open the search field (ALT+Q) and search for the page Scheduler Setup.
- The Scheduler Setup page is displayed.
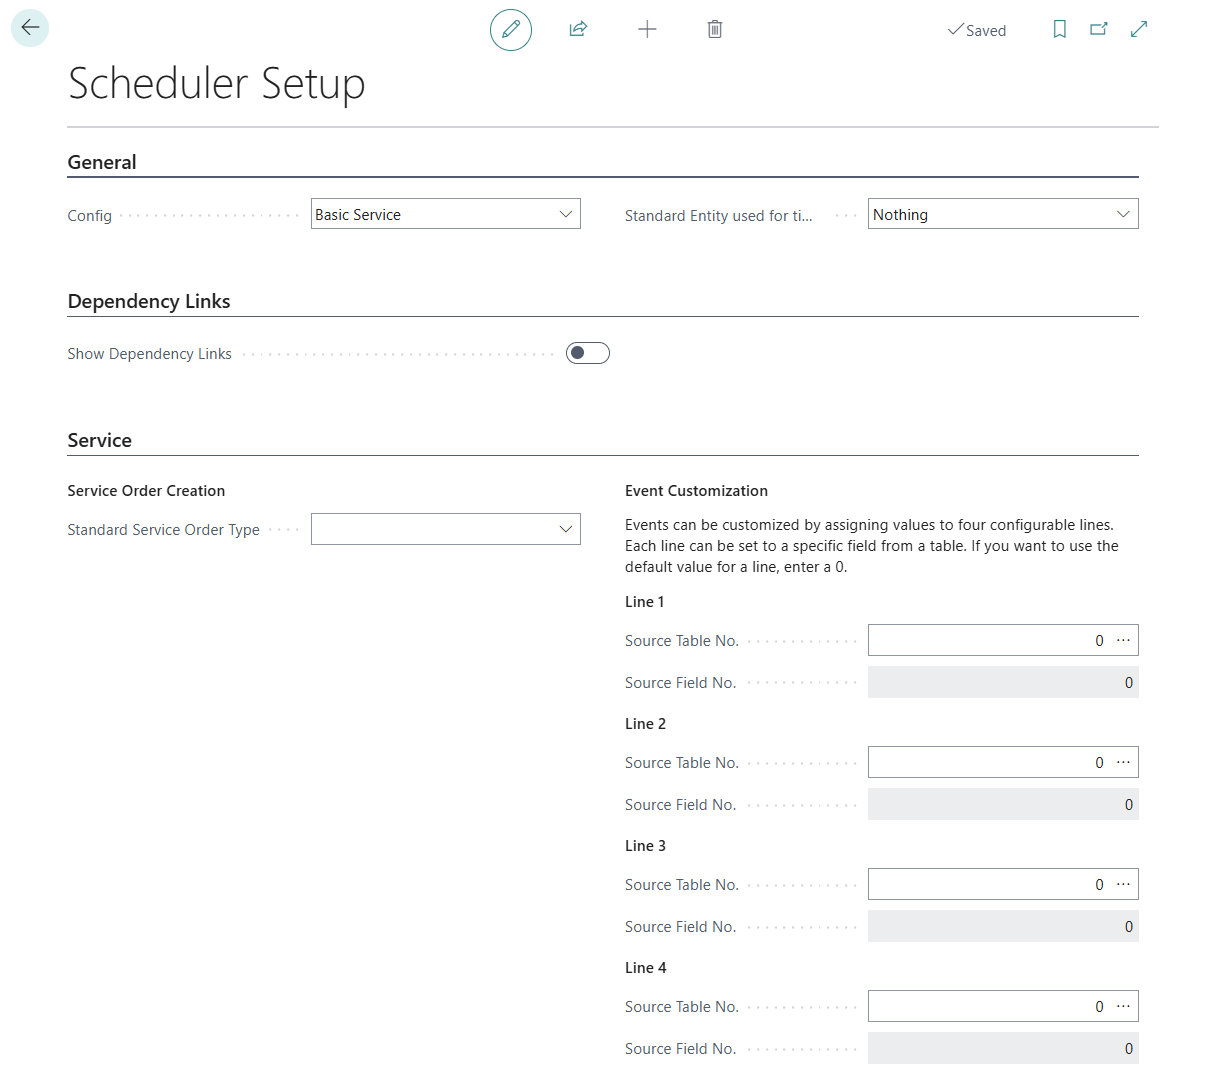
- Open the Config drop-down list.
- The available values are displayed. The default value is Basic Service. In this configuration, the Service business area is included and you can schedule service orders in the planning board. If you have purchased an individual configuration together with Beyond Scheduler, you must enter this as a value in this field in order to be able to use your individual planning elements with the planning board.
You have selected a value in the Config field.
Setup Default Behaviour
This section describes how to set up the default behavior within the planning board. The default behavior determines which planning board element (e.g. a note or service order) is created when a period is selected.
To set up the default behavior when selecting a time period in the Beyond Scheduler planning board, proceed as follows:
- Open the search field (ALT+Q) and search for the page Scheduler Setup.
- The page Scheduler Setup is displayed.
- Open the drop-down list Standard Entity used for time range click.
- The available values are displayed.
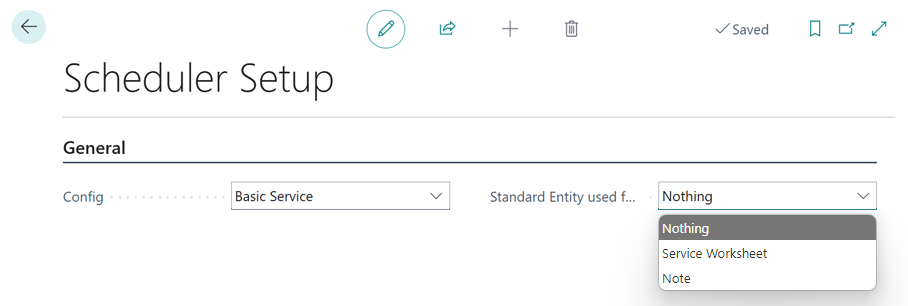
- Select one of the available values:
- Nothing: When selecting a time period, no planning element is created by default.
- Service Worksheet: When a period is selected, a service worksheet is created by default. For more information, please refer to the chapter Create Service Order & Worksheet.
- Note: A note is created by default when a time period is selected. Further information on notes can be found in the chapter Working with Notes.
You have set up the default behavior.
Show Dependency Links
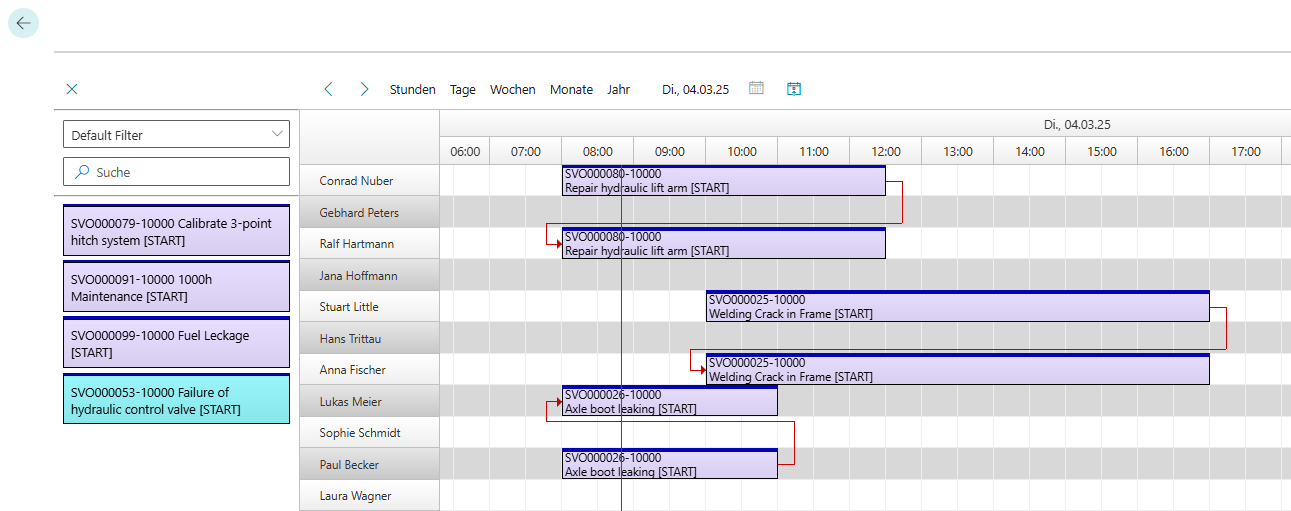
This section describes how to show dependency links in the planning board. This function is useful if you are working with several resources on one order in the planning board.
To show the dependency links in the planning board, proceed as follows:
- Open the search field (ALT+Q) and search for the page Scheduler setup.
- The Scheduler Setup page is displayed.
- Activate the Show Dependency Links slider.
You have activated the dependency links in the planning board. Copied orders in different resource lines are now linked with an arrow.
Define Default Service Order Type
This section describes how to define a service order type to be used by default. This setting defines which service order type is used when you create a service order via the planning board.
To define a service order type to be used by default, proceed as follows:
- Open the search field (ALT+Q) and search for the page Scheduler Setup.
- The Scheduler Setup page is displayed.
- Under the Standard Service Order Type field, enter the service order type to be used when you create a service order via the planning board.
For more information on how to create a service order via the planning board, please refer to the chapter Create Service Order & Worksheet.
Customize Display for Selection Area
This section describes how to configure the display of the selection area. Beyond Scheduler allows you to set which information is displayed for schedulable events in the order selection area.
To configure the order selection area, proceed as follows:
- Open the search field (ALT+Q) and search for the page Scheduler Setup.
- The Scheduler Setup page is displayed.
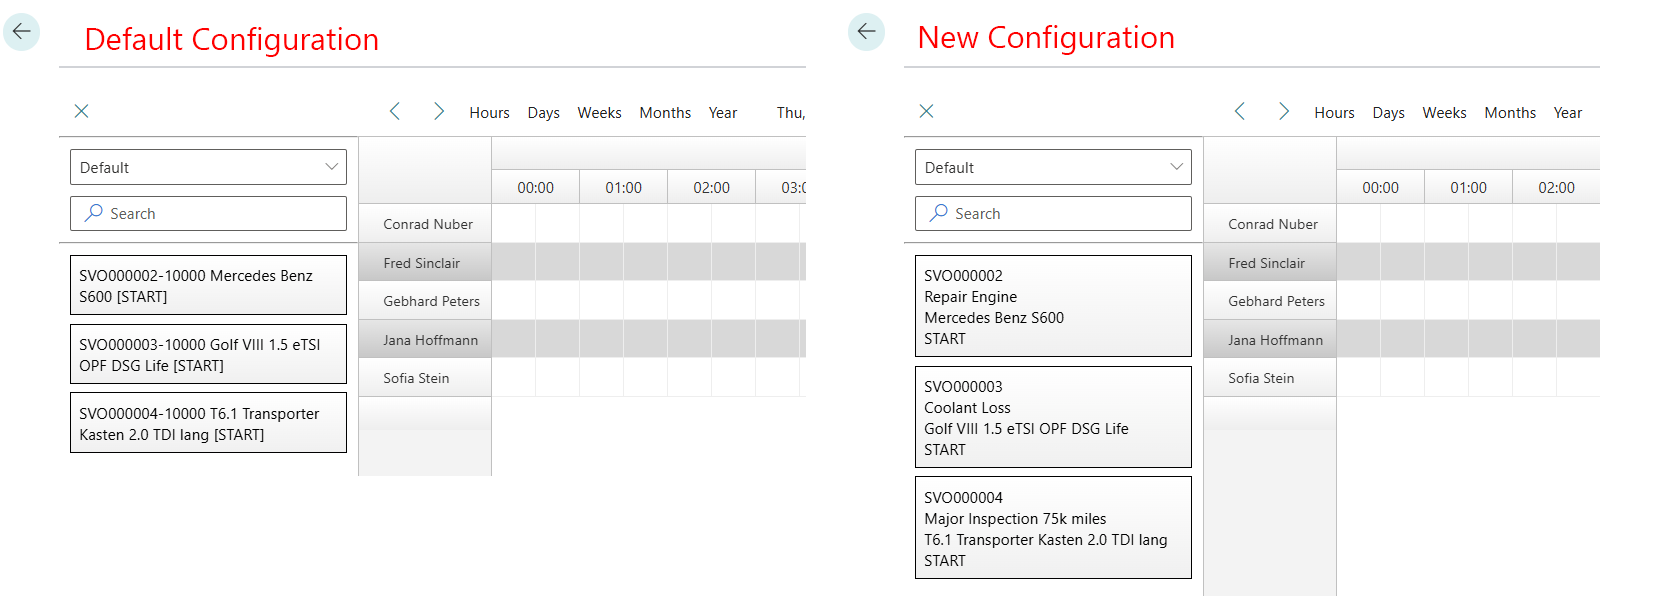
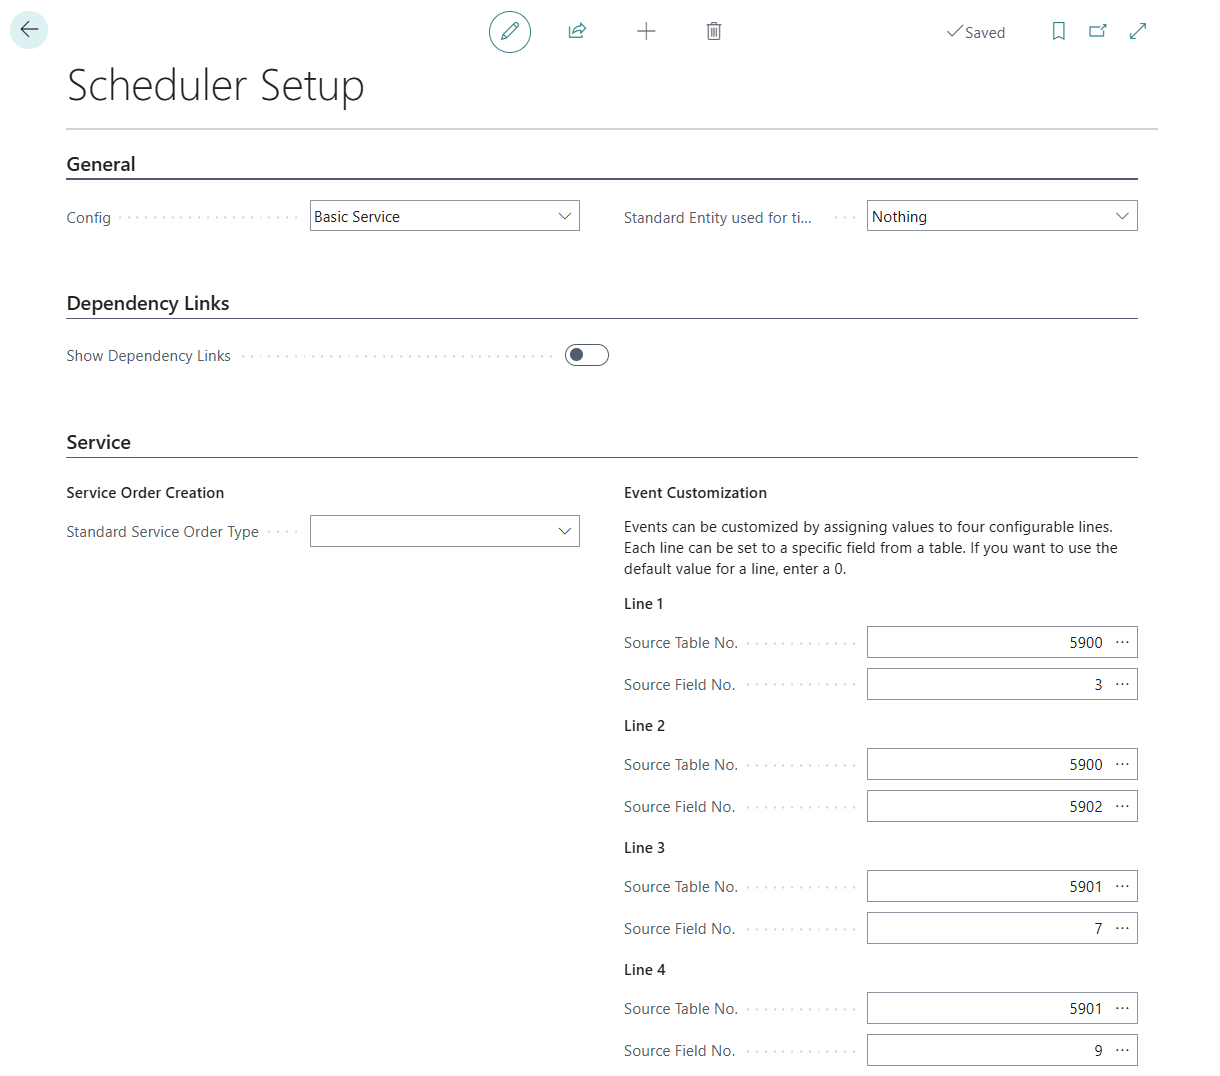
- In the Service tab under the Event Customization section, you can configure which information should be displayed for schedulable events (documents). By default, a preconfiguration has already been made that gives you a general overview of the event to be scheduled. This default configuration is explained below:
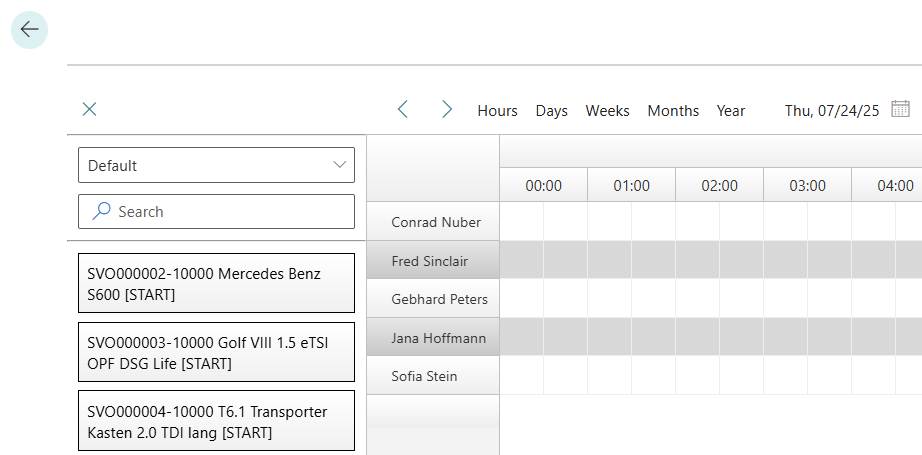
SVO000002 = Service Order Number
10000 = Service Line Number
Mercedes-Benz S600 = Service Item Description
[ANFANG] = Repair Status Code - You can use the Line 1, Line 2, Line 3, and Line 4 fields to set which information should be displayed in the events. The configuration is then adjusted to the following fields:
Line 1: Service Order Number
Line 2: Description
Line 3: Service Item Description
Line 4: Repair Status Code - If you want to change your configuration as in the example above, click on the ellipsis (…) under the Line 1 section in the Source Table No. input field.
- The Objects window appears.
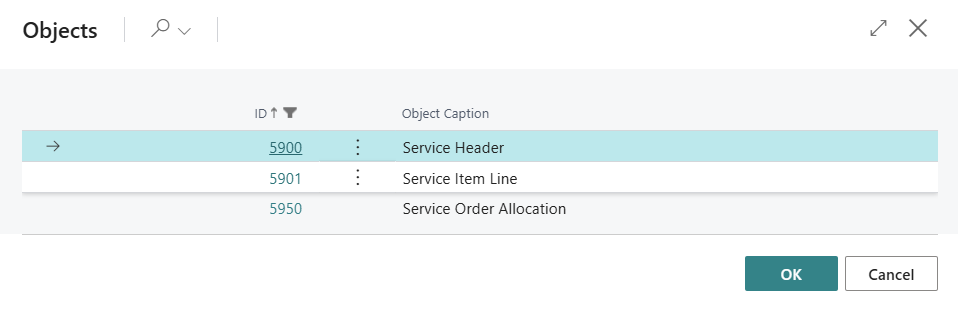
- Select a table from which you want to reference a field value that serves as information for the first line of unplanned events in the selection area. In our example, the corresponding table is Service header (ID: 5900).
- Confirm your entry with OK. The Scheduler Setup page will be displayed again.
- Under the Line 1 section in the Source Field No. input field, click on the ellipsis (…).
- The Field Lookup window is displayed.
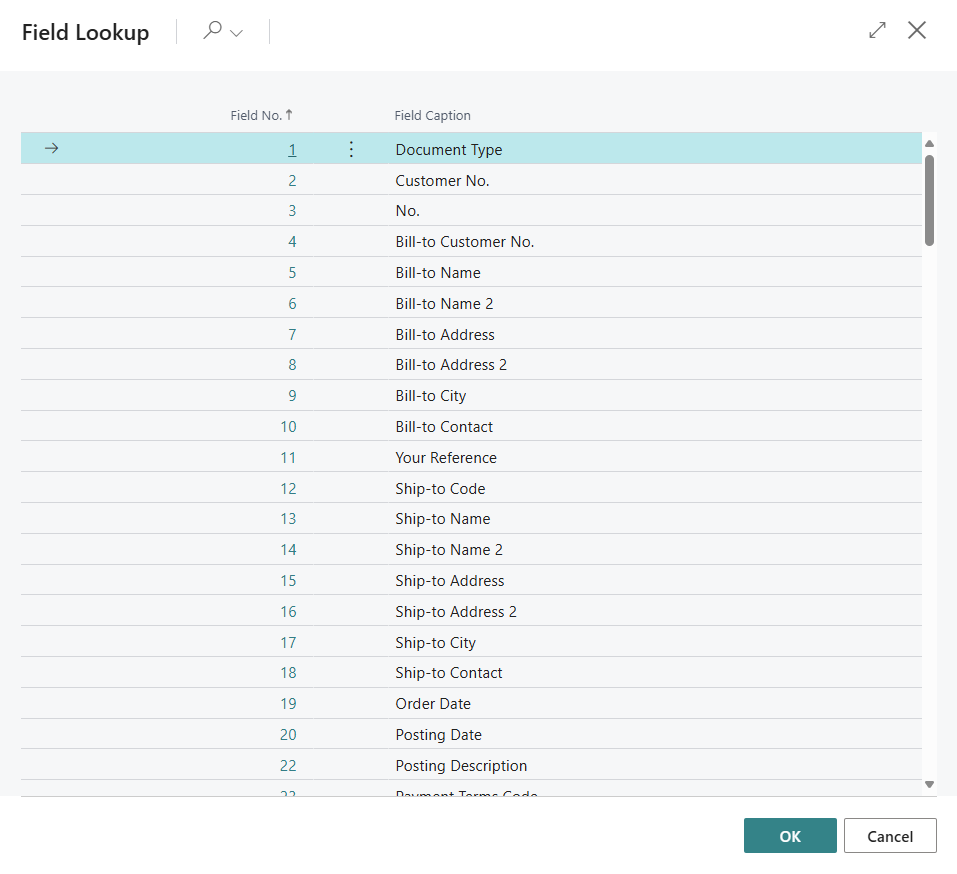
- Select the field No. (ID: 3).
- Confirm your entry with OK. The Scheduler Setup page will be displayed again.
- Under the Line 2 section in the Source Table No. input field, click on the ellipsis (…).
- The Objects window is displayed.
- Select a table from which you want to reference a field value that serves as information for the second line of unplanned events in the selection area. In our example, the corresponding table is Service Header (ID: 5900).
- Confirm your entry with OK. The Scheduler Setup page will be displayed again.
- Under the Line 2 section in the Source Field No. input field, click on the ellipsis (…).
- The Field Lookup window is displayed.
- Wählen Sie das Feld Beschreibung (ID: 5902) aus.
- Confirm your entry with OK. The Scheduler Setup page will be displayed again.
- Click on the ellipsis (...) under the Line 3 section in the Source Table No. input field.
- The Objects window is displayed.
- Select a table from which you want to reference a field value that serves as information for the third line of unplanned events in the selection area. In our example, the corresponding table is Service Item Line (ID: 5901).
- Confirm your entry with OK. The Scheduler Setup page will be displayed again.
- Under the Line 3 section, click on the ellipsis (…) in the Source Field No. input field.
- The Field Lookup window is displayed.
- Select the Description field (ID: 7).
- Confirm your entry with OK. The Scheduler Setup page will be displayed again.
- Under the Line 4 section in the Source Table No. input field, click on the ellipsis (…).
- The Objects window is displayed.
- Select a table from which you want to reference a field value that serves as information for the fourth line of unplanned events in the selection area. In our example, the corresponding table is Service Item Line (ID: 5901).
- Confirm your entry with OK. The Scheduler Setup page will be displayed again.
- Under the Line 4 section in the Source field no. input field, click on the ellipsis (…).
- The Field Lookup window is displayed.
- Select the Repair Status Code field (ID: 9).
- Confirm your entry with OK. The Scheduler Setup page will be displayed again.
You have customized the display for the selection area.