Import Beyond Catalog Item
This chapter describes how to import a catalog or an item list with data records as Beyond Catalog Items.
Note
Check data quality
The following description explains how you can import large amounts of data into your Business Central. Please note that the import is difficult to undo. Before importing, check the data for quality (completeness, duplicates, up-to-dateness, incorrect values due to file format changes, etc.). Test the import in your demo environment to rule out possible errors before you start the import into your productive live system.
Note
Consider utilization with large data volumes
When processing large volumes of data, productive operation may be impaired. We therefore recommend carrying out the import outside of business hours or at the beginning/end of the business day.
Note
Note file format
The Beyond DataImporter app contained in Beyond CatalogV2 as a substructure (dependency) enables you to import catalogs and item lists into your Business Central and create a data record from each line as a Beyond Catalog Item. The catalog/item list should be available as an XLSX, TXT or CSV file.
After the import, each company in your Business Central environment can use the new data records in the Beyond Catalog Items list and create company specific items from them. The newly created items are displayed on the Beyond Catalog Items card in the factbox (ALT+F2). For more information on how to create an item from a Beyond Catalog Item, please refer to the chapter Create Item from Beyond Catalog Item Master.
To view an item list or a catalog that you have received from a vendor or manufacturer, proceed as follows:
- Open the search function from the role center (ALT+Q).
- Search for Data Import Templates and click on the corresponding search result.
- The Data Import Templates list is displayed.
- To create a new data import template, click on New in the menu bar.
- Enter a code for the data import template under the No. column.
- Enter a description for the data import template under the Name column.
- Under the Processor column, select the import routine for the data you want to import. To import the item list or the catalog as Beyond Catalog Item, you must select the value Beyond Catalog Item. The value for the Last import on column is automatically filled by the system as soon as the import has been successfully completed.
- To upload the file for the item list/catalog, click on the Importer option in the menu bar.
- A window is displayed.

- Click on the Select file button and upload the item list/catalog.
- Additional lines are displayed in the window.
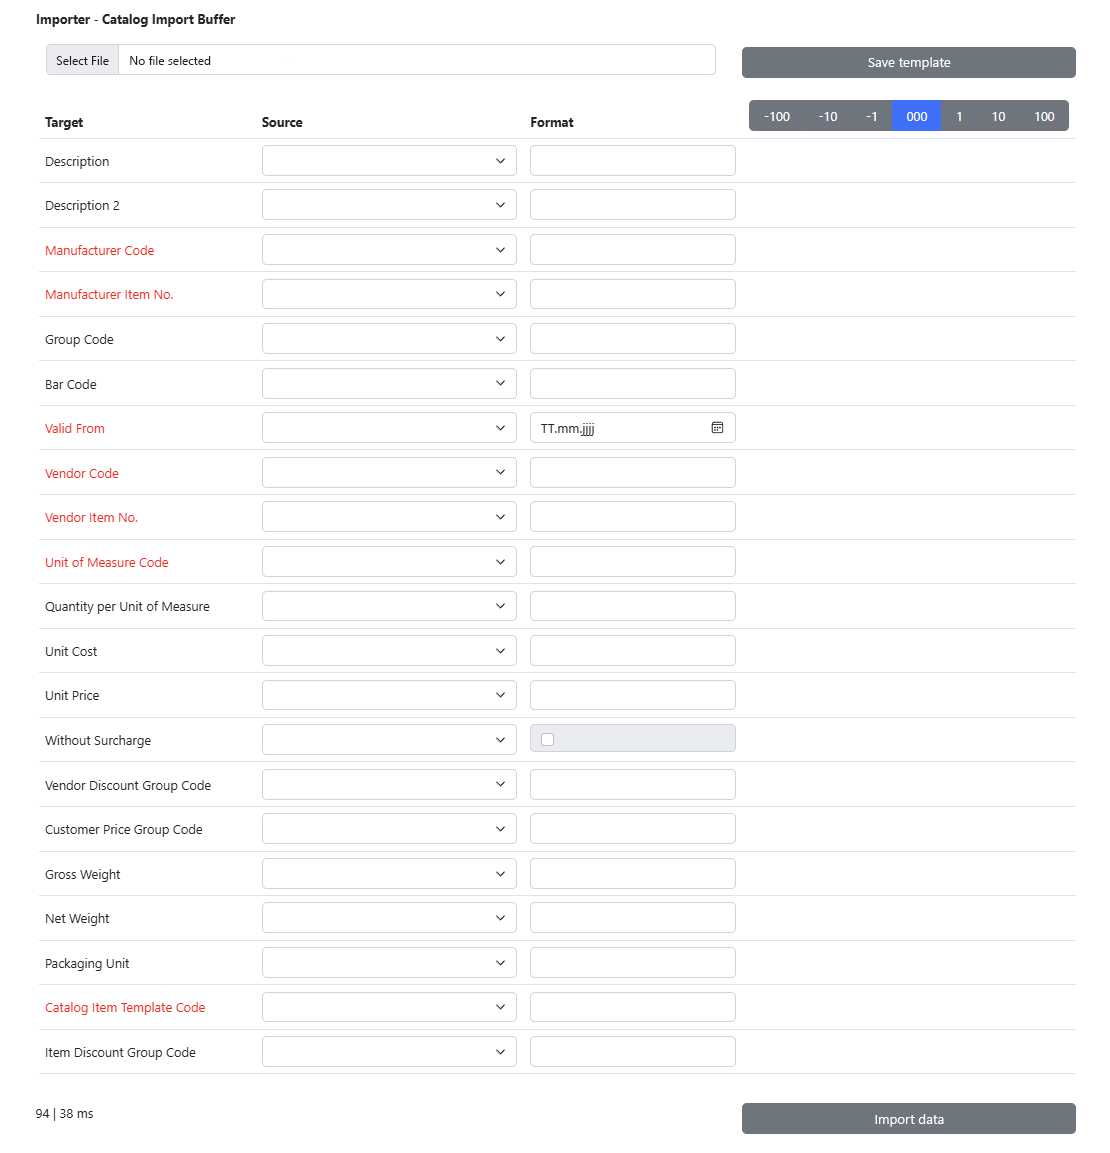
- Under the Source column, assign the information from the item list/catalog to the fields on the Beyond Catalog Item card. The fields marked in red are mandatory fields, i.e. you must make an assignment for this information.
- Once you have made the assignments, click on Save template. This allows you to use the same assignments when updating the item list/catalog.

- Once you have made the assignments, click on Save template. This allows you to use the same assignments when updating the item list/catalog.
- To import the data records from the list/catalog as Beyond Catalog Items, click on the Import data option.
- Under certain circumstances, the Field Values window is displayed and you have to create relations for the import.

- The checkbox under the Relation is valid column indicates whether a relation needs to be set up. To set up a relation, select the column and click on the ellipsis (…) in the menu bar.
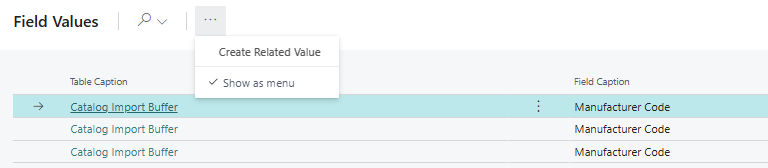
- Select the Create Related Value option from the menu.
- Establish the relationship. Make sure that you assign a value from the item list or the catalog to a value in your system.
- Once you have created all relational values, click OK to import the data.
You have added all data sets contained in the file as Beyond Catalog Items to your Business Central. Save the data import template so that you do not have to make the assignments again when updating prices or other information.