Create Markup List
This section describes how to create a markup list.
To create a markup list, proceed as follows:
- Open the search function from the role center (ALT+Q).
- Search for Markup List and click on the appropriate search result.
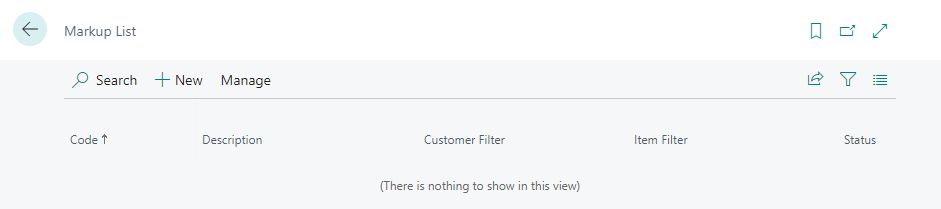
- The Markup List page is displayed.
- Click New in the menu bar.
- A new Markup Card is displayed.
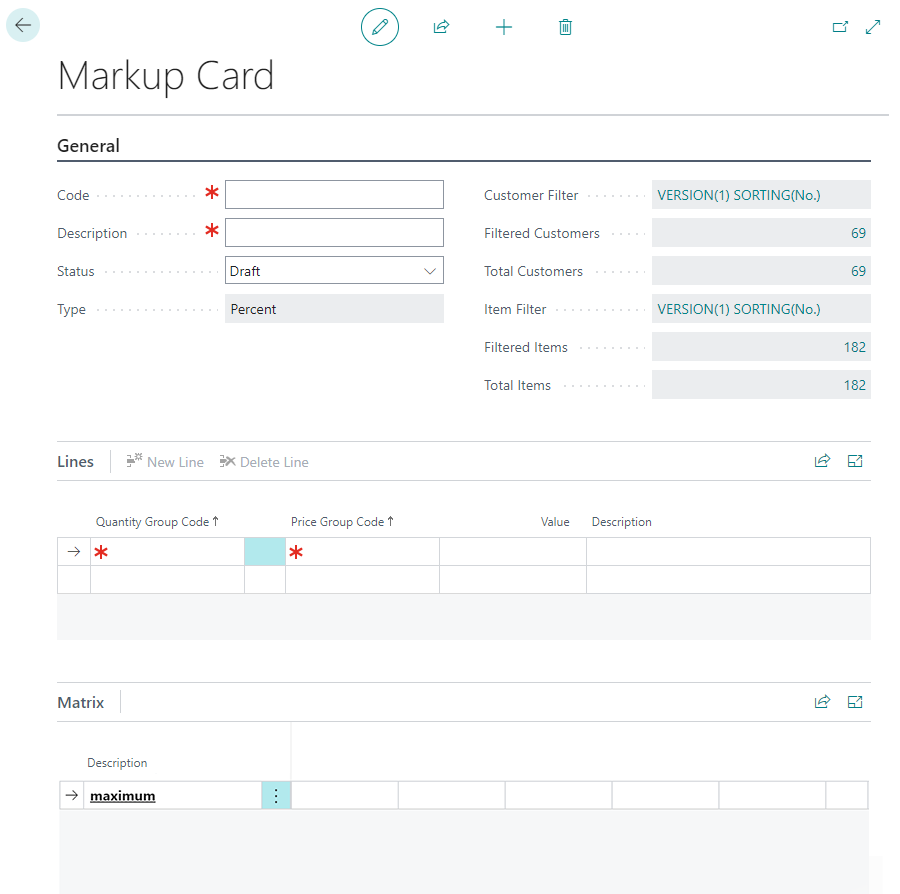
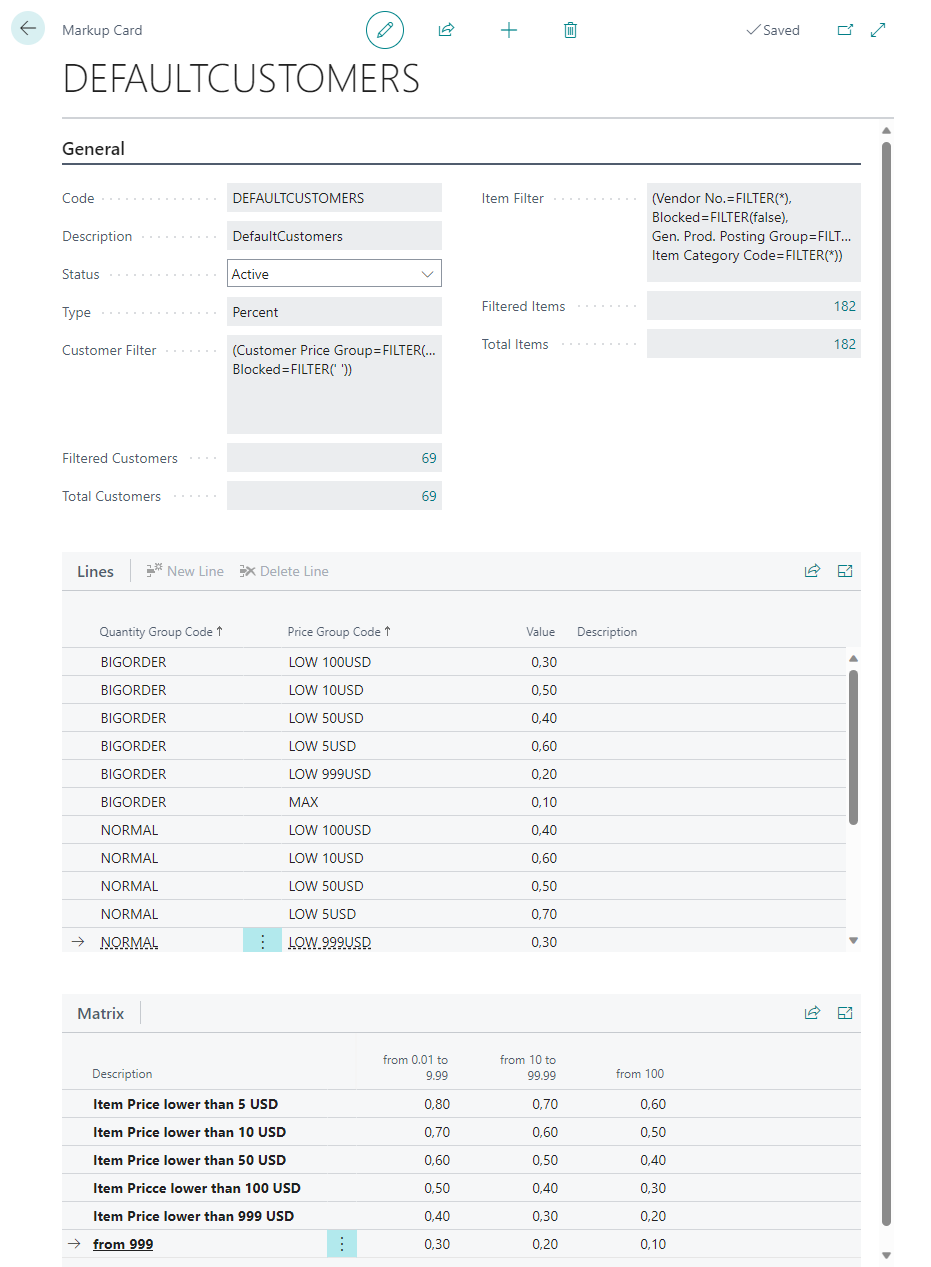
- In the Code field, enter a code for the markup you want to configure.
- Enter an appropriate name for the markup in the Description field.
- Leave the Status field set to Draft for now. With this setting you activate the configured markup.
- The value in the Type field is determined by the Price Setup page.
- Click in the Customer Filter field to use the filter to specify customers to which this markup should be applied.
- The Filter Page window is displayed.

- In this window you can limit the number of customers for which the markup configured later will be applied. If you do not make any setting, the markup will be applied to all customers. After setting the filter, return to the markup card.
- The values in the Filtered Customers and Total Customers fields show you the exact figures for the customers that are stored in the system and the number of customers for which the markup configured later will be applied.
- Click in the Item Filter field if you want to apply the markup only to specific items.
- The Filter Page window is displayed.
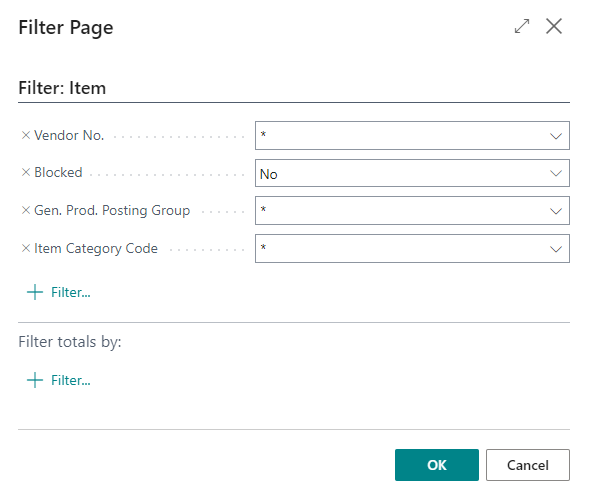
- In this window you can limit the number of items to which the markup configured later will be applied. If you do not make any setting, the markup will be applied to all items. After setting the filter, return to the markup card.
- The values in the Filtered Items and Total Items fields show you the exact figures for the items that are stored in the system and the number of items for which the markup configured later will be used.
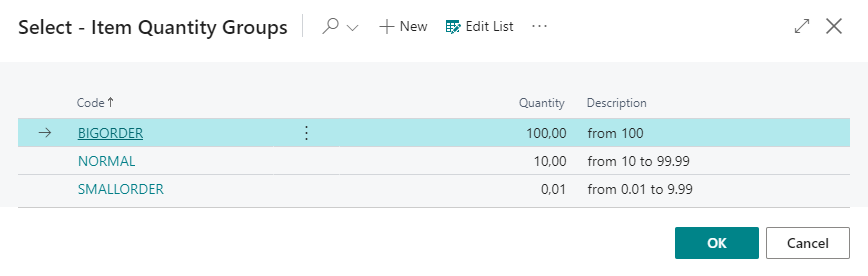
- Under the Lines area, select a quantity group for the Quantity Group Code column. You can use the price group later in the markup matrix to define whether a specific markup should be used for a combination of item quantity and item price. When creating the item quantity groups, make sure that you also sell partial quantities for items (for example, 0.5 L oil or other items). The item quantity group always applies from a certain quantity to the next item quantity group.
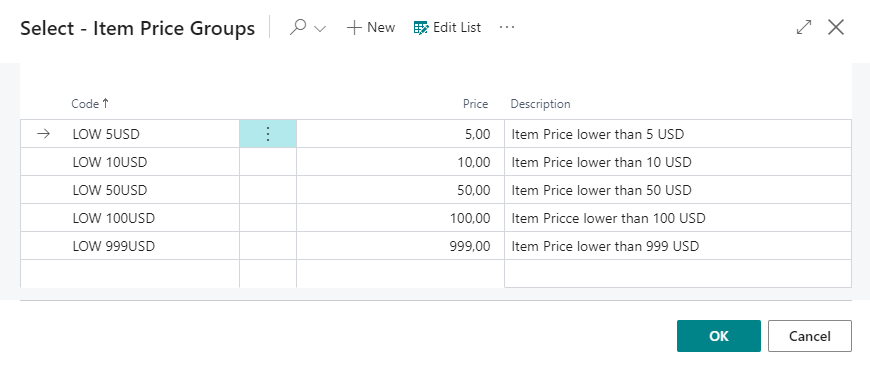
- In the markup card, click in the Price Group Code column and create one or more price groups. Using the price group, you can later define in the markup matrix whether a specific markup should be used for a combination of item quantity and item price.
- On the markup card, under the Lines area, select a combination of one of the created item quantity groups and one of the created item price groups.
- Enter the value for the combination under the Value column. The value is either a percentage value, a fixed amount, or a mix of the two options. This depends on the price setup under the Set up Beyond PriceChanges section.
- Under the Matrix area, the combinations you entered are displayed.
- To use the configured markups in documents, under the General tab, in the Status field, change the value from Draft to Active.
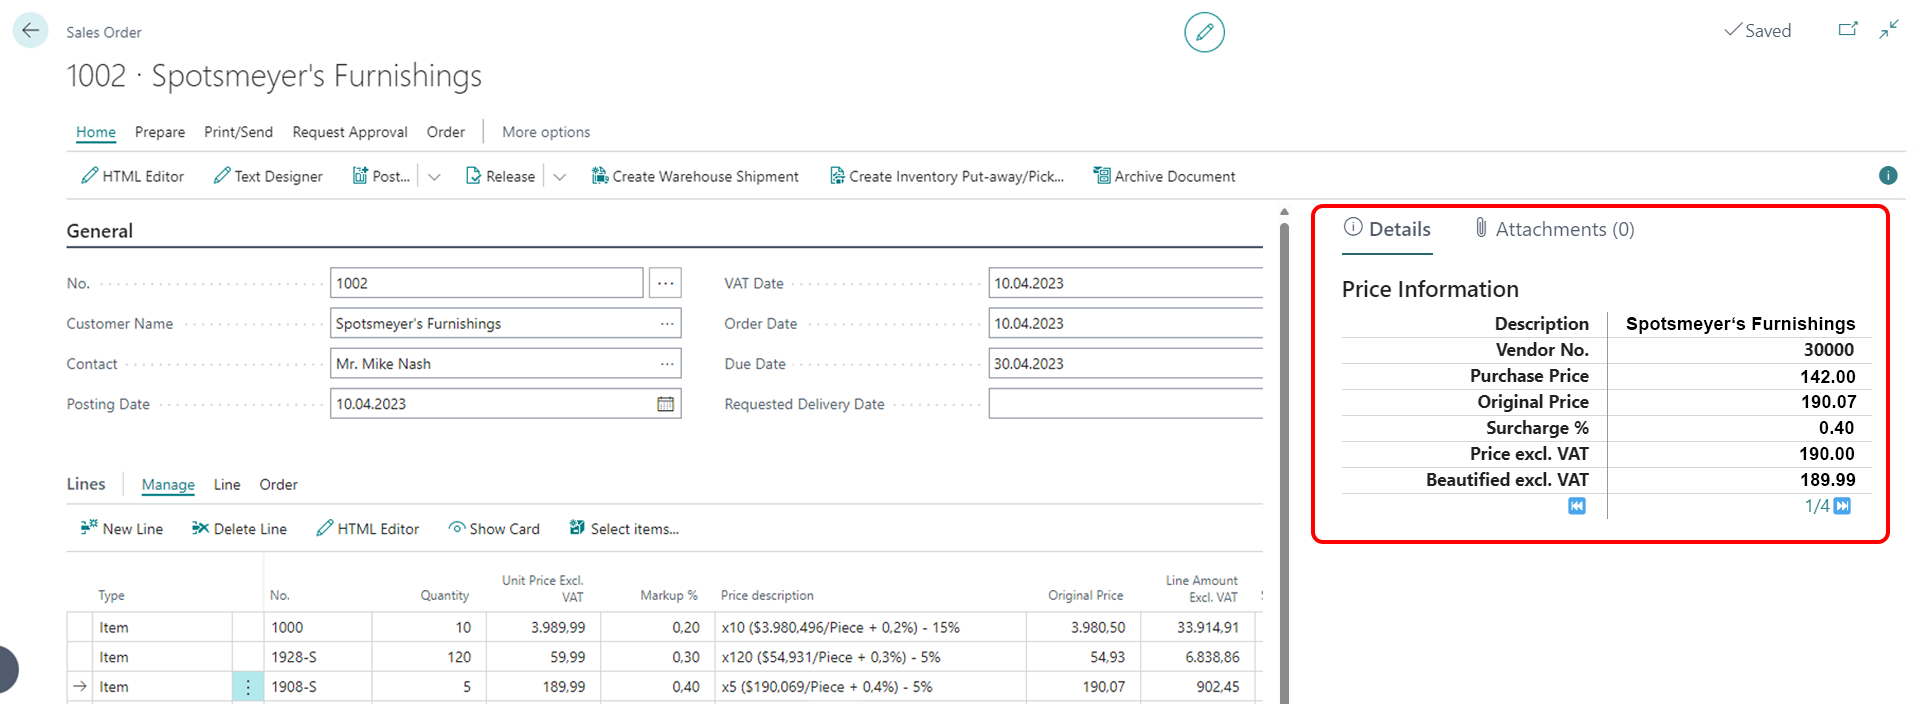
After successful setup of Beyond PriceChanges, two fields will be added to Lines section in sales and service documents. The Markup and Price Description fields show the applied markup (which is based on item price and item quantity) and the price calculation (including the beautified price).
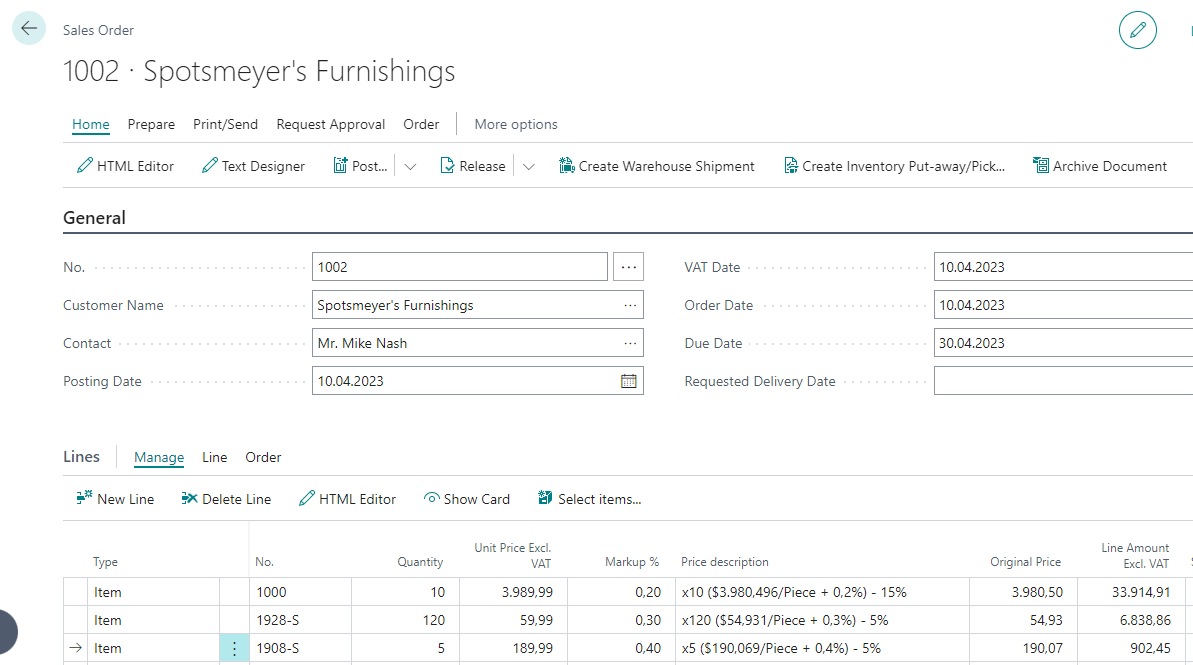
In addition to the new columns in the Lines area, additional information is contained in a factbox on the right-hand side of the screen. You can show the factbox area by pressing ALT+F2 if it is not displayed by default. The information under the Price Information tab is displayed on sales order cards, service lines and in the service item worksheet.