Sales Order
This chapter explains the functions of Beyond InventoryApp in relation to the sales order in Business Central.
Note
Please note that a corresponding document must always be available in the system in order to use Beyond InventoryApp. Only an existing sales order can be selected via the app's user interface. It is not possible to create a sales order via Beyond InventoryApp. If you do not have a sales order, you must create it in the standard Business Central app.
This chapter is divided into the following sections:
Add item lines to a sales order
This functional example describes how you can add new item lines to a sales order. This function is used, for example, when you select items with the customer in the store area.
Note
Please note that you can only select sales orders whose status is Open. No sales orders with Released status are displayed in the document selection. If you want to add item lines to a sales order whose status is Released, you must first reset the status to Open before you can select the document via the Inventory App page.
To add items to a sales order via Beyond InventoryApp, proceed as follows:
- Open the search field (ALT+Q) and search for the page Inventory App.
- The Inventory App page is displayed.
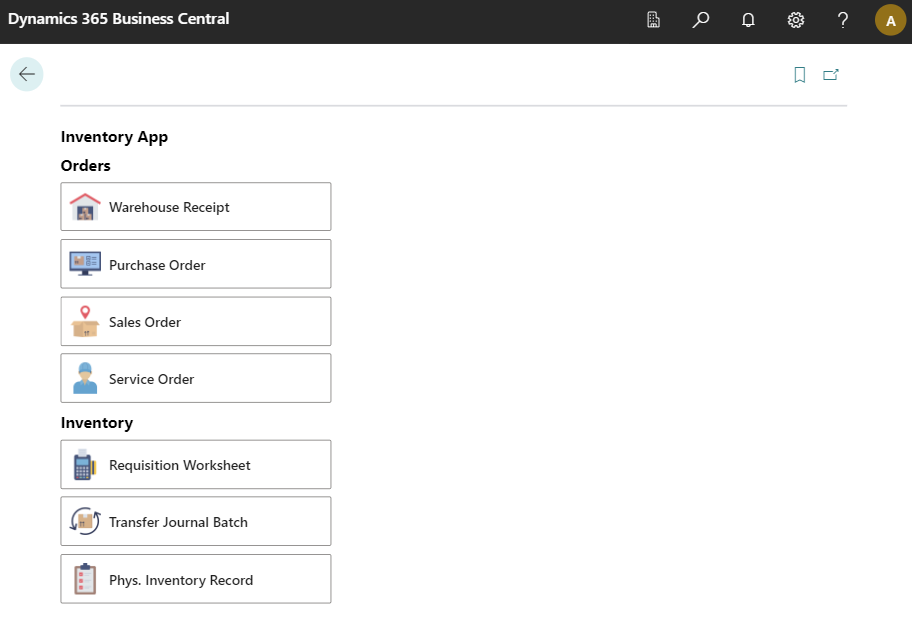
- Select Sales Order.
- The document selection is displayed.
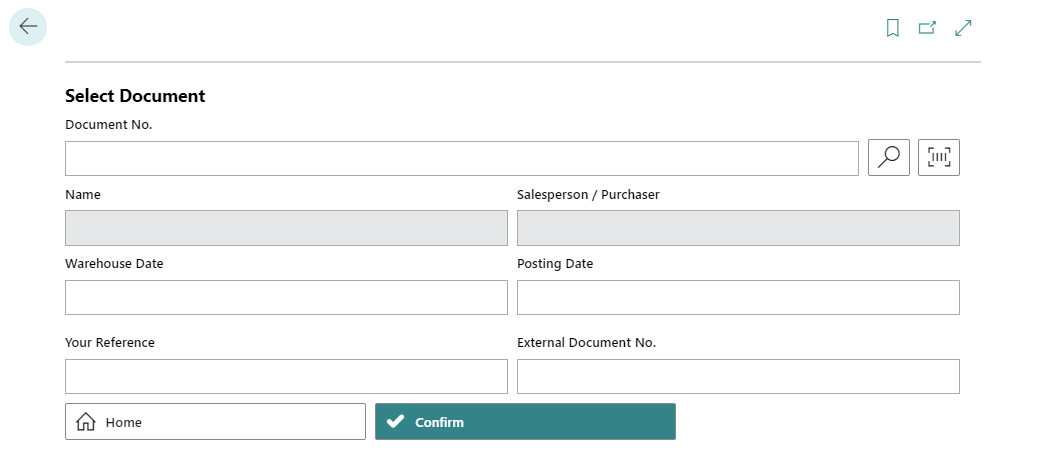
- Select a document:
- Use the scanner function
 with your mobile device and scan the barcode on a sales order.
or - Select the magnifying glass icon
 to select the sales order from the overview of all sales orders.
After selecting the document, additional information is displayed in the fields.
- Use the scanner function
- Select the Confirm
 icon.
icon. - The Sales Order card is displayed.
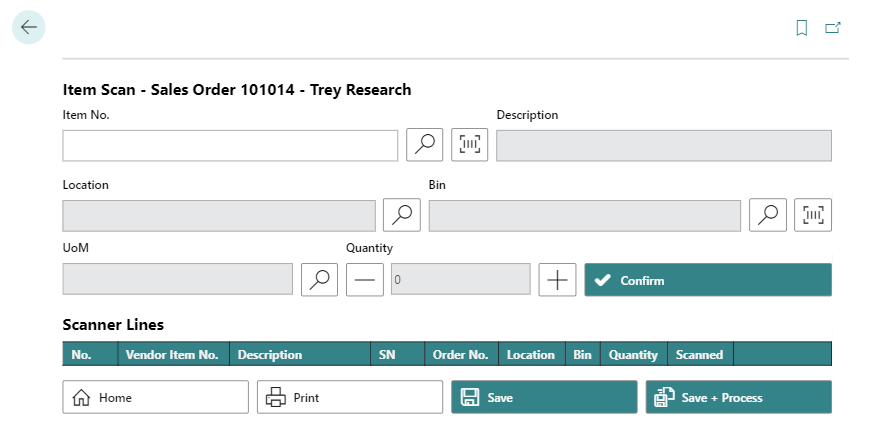
- To add an item to the document lines, enter the item number in the Item No. field:
- Use the scanner function with your mobile device and scan the item barcode.
or - Select the magnifying glass icon to select an item from the overview of all items.
- Use the scanner function
- The storage location for the item is displayed in the Location field.
- The storage bin for the item is displayed in the Bin field.
- You can increase or decrease the number of items using the plus and minus buttons under Quantity.
- To add the item in the specified quantity to the lines, select the Confirm button.
- The added item line is highlighted in green in the app. If you have added an item requiring a serial number to the sales order, you must enter the serial number. You can find more information on this in the chapter Check Sales Order.
- Select Save to transfer the line to the sales order.
- If you want to add all item lines to the voucher and post the voucher, select the Save + Process button.
You have added one or more item lines to an empty sales order.
Check Sales Order
This section describes how you can check a sales order with Beyond InventoryApp.
For the following description, we assume that a sales order with item lines already exists.
In our example, a sales order also contains an item requiring a serial number, the serial number of which must be entered subsequently.
Proceed as follows to check the sales order:
- Open the search field (ALT+Q) and search for the page Inventory App.
- The Inventory App page is displayed.
- Select Sales Order.
- The document selection is displayed.
- Select a document:
- Use the scanner function with your mobile device and scan the barcode on a sales order.
or - Select the magnifying glass icon to select the sales order from the overview of all sales orders.
After selecting the document, additional information is displayed in the fields.
- Use the scanner function
- Select the Confirm icon.
- The sales order card is displayed.
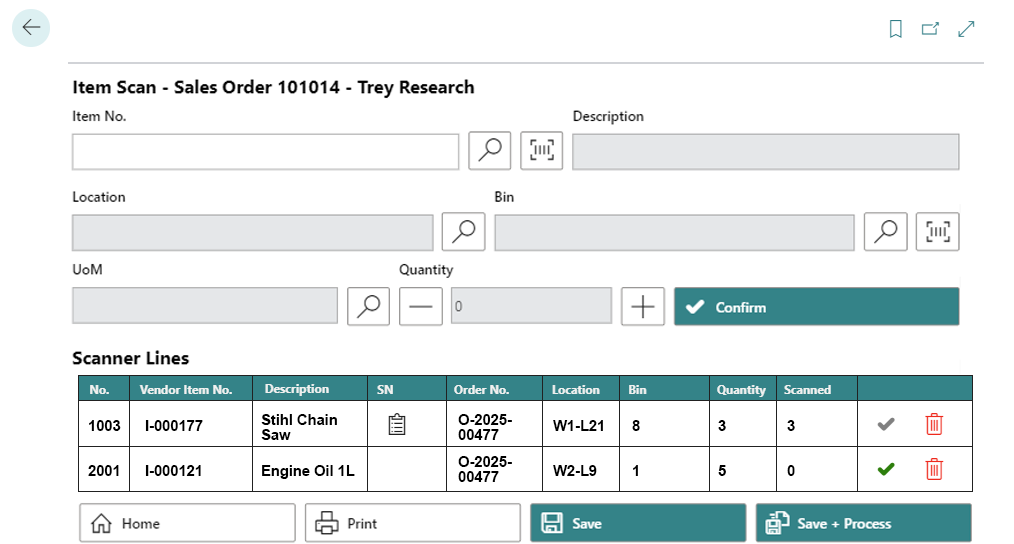
- Check the item quantities specified on the purchase order against the item quantities delivered. If the quantities match, select the green tick behind the corresponding item line. If the item requires a serial number, you must enter the serial number. To do this, select the clipboard icon
 in the SN column.
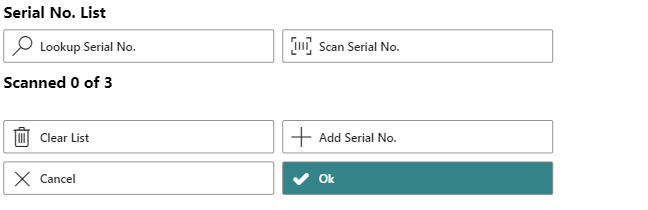
- The Serial No. List window is displayed.
- Enter the serial number.
- To do this, select the search function if you want to select a serial number already stored in the system.
- To do this, select the scanner function if you want to scan and insert the barcode of a serial number.
- Select the plus symbol
 if you want to enter the serial number manually using the keyboard.
- To do this, select the search function
- Confirm the entered serial number.
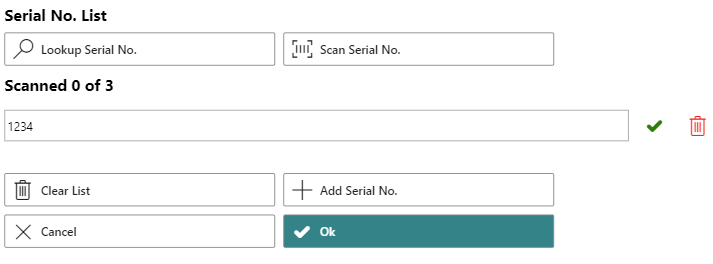
- Repeat the process until all serial numbers have been confirmed and then click OK to transfer them to the document card.
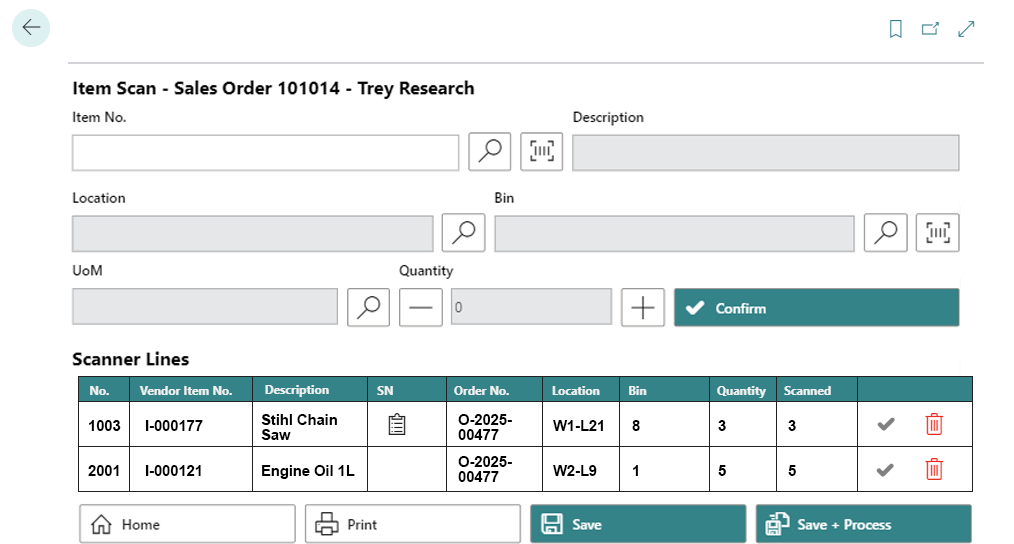
- As shown in the screenshot, the value under the Scanned column is changed when you enter serial numbers.
- Confirm the quantity of items that do not require a serial number by selecting the green tick on the right-hand side of the screen
 .
. - To save only the changes to the document, select Save. If you also want to post the document, select Save + Process.
You have checked the sales order and maintained the item quantities (and serial numbers, if applicable).