Warehouse Receipt
This chapter explains the functions of Beyond InventoryApp in relation to the warehouse receipt in Business Central.
Note
Warehouse employee required In order to use the Beyond InventoryApp functions described below, your user account must be registered as a warehouse employee. For more information on how to set up a user as a warehouse employee in your Business Central, please refer to the chapter Set up warehouse employee.
Note
Warehouse Receipt required You cannot create receipts with Beyond InventoryApp. In order to use the functions of Beyond InventoryApp with regard to warehouse receipts, corresponding documents must be available in the system. Further information on warehouse receipts can be found in the chapter Receive items with a warehouse receipt.
- Open the search field (ALT+Q) and search for the page InventoryApp.
- the InventoryApp page is displayed.
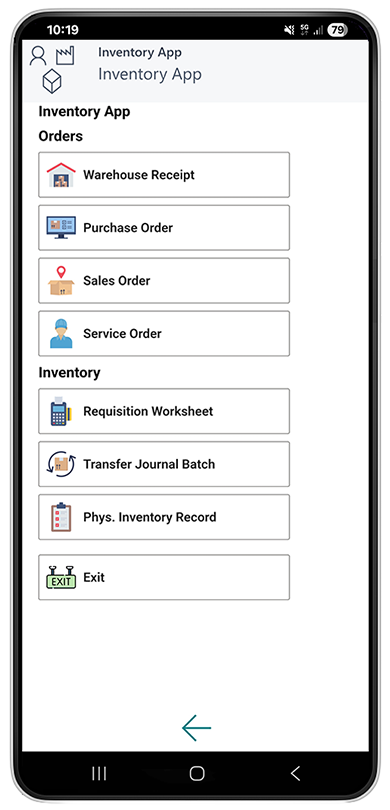
- Select Warehouse Receipt.
- The document selection is displayed.
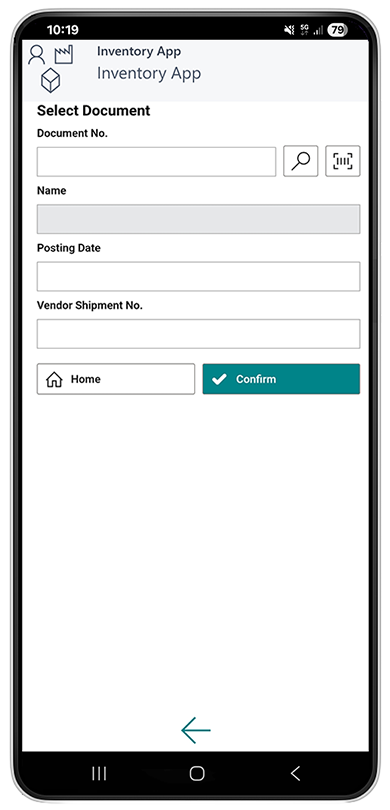
- Select a document:
- Use the scanner function
 with your mobile device and scan the barcode on a warehouse receipt.
or - Select the magnifying glass icon
 to select the warehouse receipt from the overview of all warehouse receipts.
After selecting the document, additional information is displayed in the fields.
- Use the scanner function
- Click on Confirm to open the receipt in Beyond InventoryApp.
- The receipt is displayed in Beyond InventoryApp.
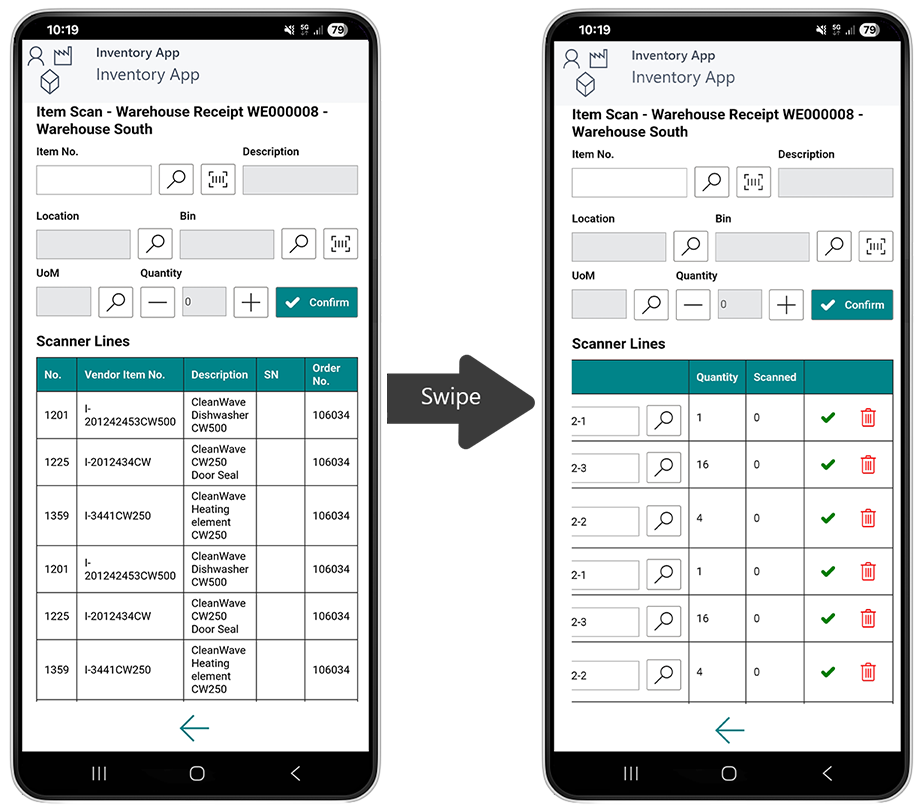
- To select an item, enter the item number in the Item No. field:
- Use the scanner function with your mobile device and scan the item barcode.
or
- Select the magnifying glass icon to select an item from the overview of all items.
- Use the scanner function
- Enter the quantity in the Quantity field.
- Tap Confirm to add the item in the corresponding quantity to the lines.
- You can also specify a storage bin in the item lines if required.
- To save only the changes to the voucher, select Save. If you also want to post the document, select Save + Process.
You have entered a warehouse receipt.