Add Rich Text to Documents
This chapter describes how to add rich text to a document. You can use texts already created from Rich Text templates, modify these texts or create new texts.
For more information about rich text templates, see the chapter Create Rich Text Template.
Rich Texts can be added to the following documents:
| Purchase | Sales | Service |
|---|---|---|
| Blanket Purchase Order | Blanket Sales Order | Service Contracts |
| Purchase Credit Memo | Sales Credit Memo | Service Credit Memo |
| Purchase Invoice | Sales Invoice | Service Invoice |
| Purchase Order | Sales Order | Service Order |
| Purchase Quote | Sales Quote | Service Quote |
| Purchase Return Orders | Sales Return Order |
To add a rich text to a document, proceed as follows:
- Navigate to the document for which you want to add a rich text.

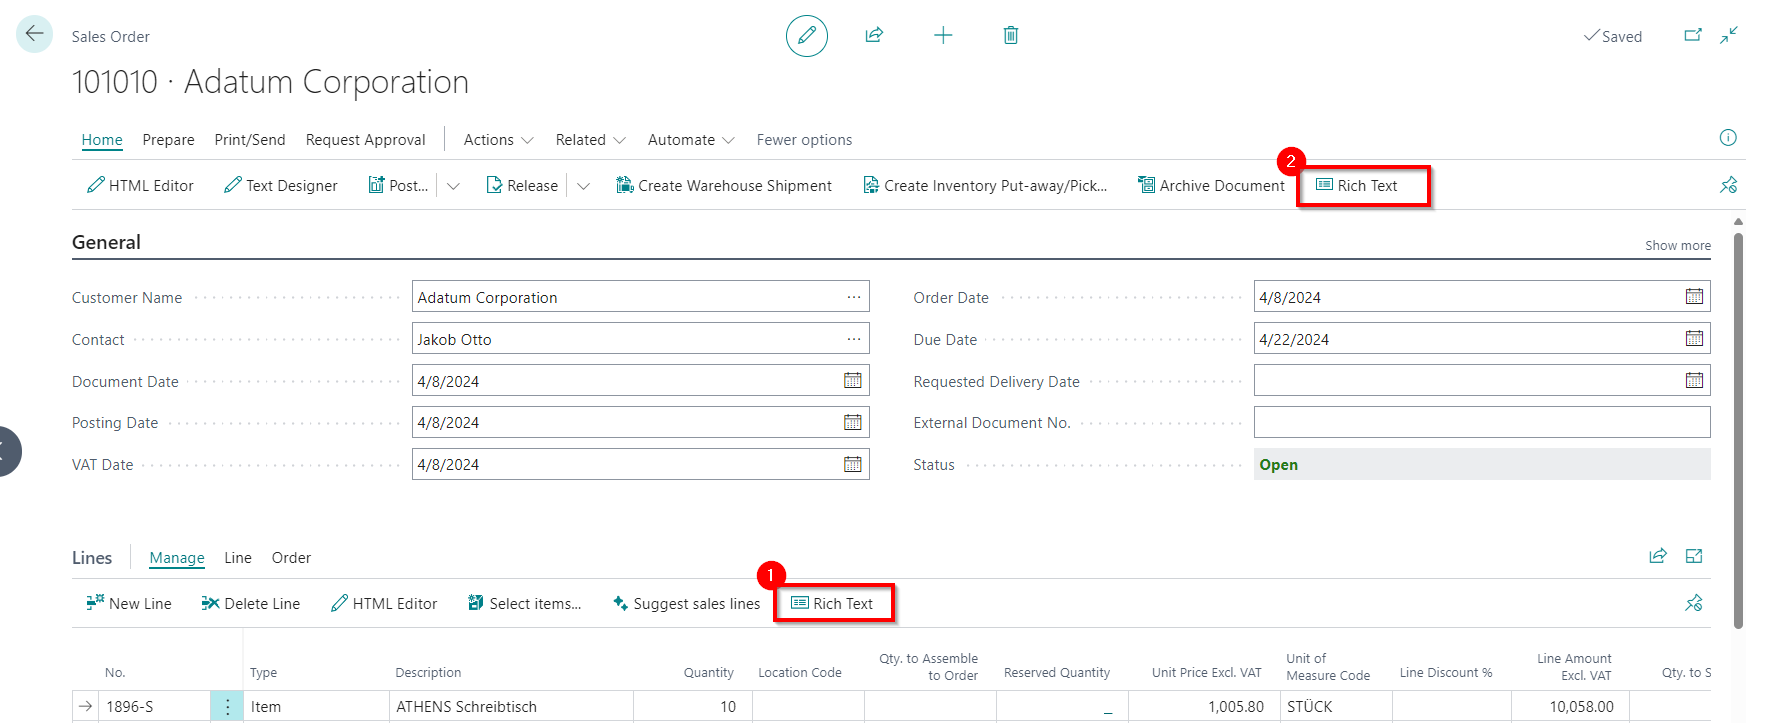
Figure: Add Rich Text to document - You can add a rich text for a document line (1) or for the document header (2). To do this, click on the corresponding button.

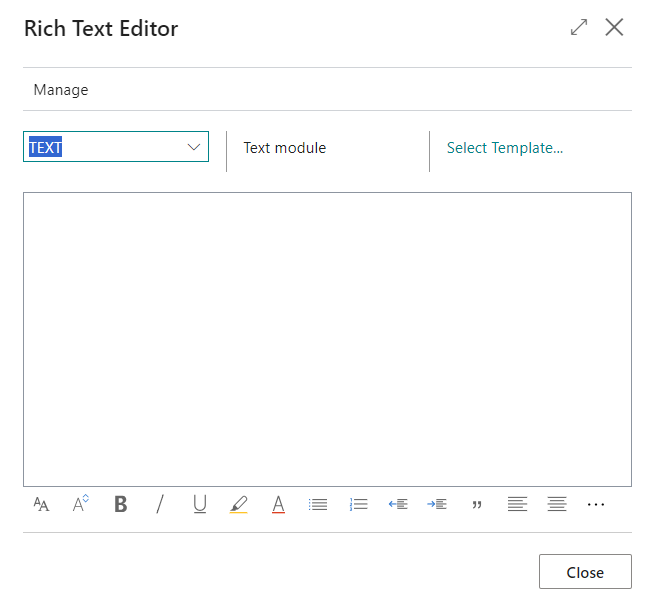
Figure: Select Rich Text Type - Select the rich text type from the dropdown menu.
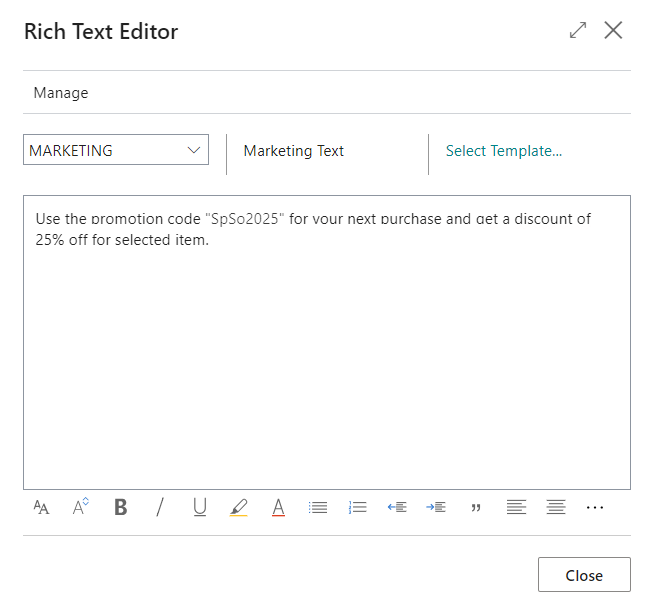
- In the Rich Text Editor window, click on the Select template... option and select one of the available templates. Alternatively, you can also enter the desired text directly in the window.

Figure: Rich Text added - The following options are available to you for designing the texts:
| Icon | Description |
|---|---|
 |
Font: Click on this icon to change the font of the text. |
 |
Font Size: Click on this icon to change the size of the font. |
 |
Font Style Bold: Click on this icon to change the font style between bold or normal. |
 |
Font Style Italic: Click on this icon to change the font style between italic or normal. |
 |
Font Style Underlined: Click on this icon to change the font style between underlined or normal font style. |
 |
Background Color: Click on this icon to define the color behind the font. |
 |
Font Color: Click on this icon to define the color of the font. |
 |
Bulleted List: Click on this icon to format the selected text as a bulleted list. |
 |
Ordered List: Click on this icon to add a number to the selected text. |
 |
Reduce indentation: Click on this icon to reduce the indentation of the text. |
 |
Increase indentation: Click on this icon to increase the indentation of the text. |
 |
Quote: Click on this icon to mark the text as a quote. |
 |
Align Left: Click on this icon to align the text to the left. |
 |
Align Center: Click on this icon to align the text to the center. |
 |
Align Right: Click on this icon to align the text to the right. |
 |
Add Link: Click on this icon to insert a link into the text. |
 |
Delete Link: Click on this icon to remove the selected link in the text. |
 |
Superscript: Click on this icon to format the selected text as superscript. |
 |
Subscript: Click on this icon to format the selected text as subscript. |
 |
Strikethrough: Click on this icon to format the selected text with a strikethrough. |
 |
Add Image: Click on this icon to add an image. |
 |
Add Alternative Text: Select an image in the text and click on this icon to add an alternative text (image caption). |
 |
Text Direction From Left To Right: Click on this icon to format the selected text from left to right. |
 |
Text Direction From Right To Left: Click on this icon to format the selected text from right to left. |
 |
Revert Changes: Click on this icon to undo your changes to the text. |
 |
Repeat: Click on this icon to repeat your changes to the text after you have reverted them. |
 |
Delete Formatting: Click on this icon to remove the formatting from the selected text. |
 |
Insert Table: Click on this icon to insert a table into the text. |
You have added a rich text to a document or a line.