Print several Field Values Of A Record In One Line
This chapter describes how to set up a complex case for printing several field values of a data record in one line. The functionality is explained using an example.
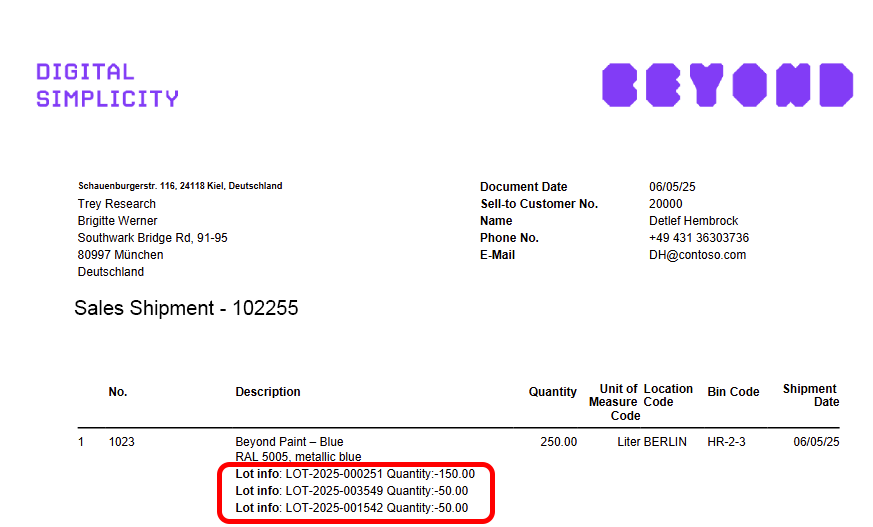
In this example, the document lines of the sales shipment are set up to display lot numbers and the corresponding lot quantities of an item.
[!INOTE]
Display of added fields
Please note that fields are only printed in the report if they have a field value. If fields that you added do not have a field value, they will not be printed in the report. If the field is not printed, you must maintain the data and enter a field value.
[!INOTE]
Settings for added fields
Please note that changes to the formatting in the Fields area override the general print settings, i.e. if you make a change in the Font, Font Size, Print Bold and Alignment columns for this line, this will only affect this line.
Tip
Show preview in a separate browser window
A preview of the report is displayed in the factbox (ALT+F2). However, to customize reports quickly and easily, we recommend that you open the report preview (on the Report Settings page) in a separate browser window. If you make a change to the report design, you can then track the change to the report at any time by clicking on the Refresh button.
To print several field values of a data record in one line, proceed as follows:
- Open the search function from the role center (ALT+Q).
- Search for Report Setups and click on the corresponding search result.
- The Report Setups page is displayed.
- Select the relevant report from the list and click on the value under the ID column in the report line. In the example, we select the report Sales Shipment with the ID 5606634.
- The report card is displayed.
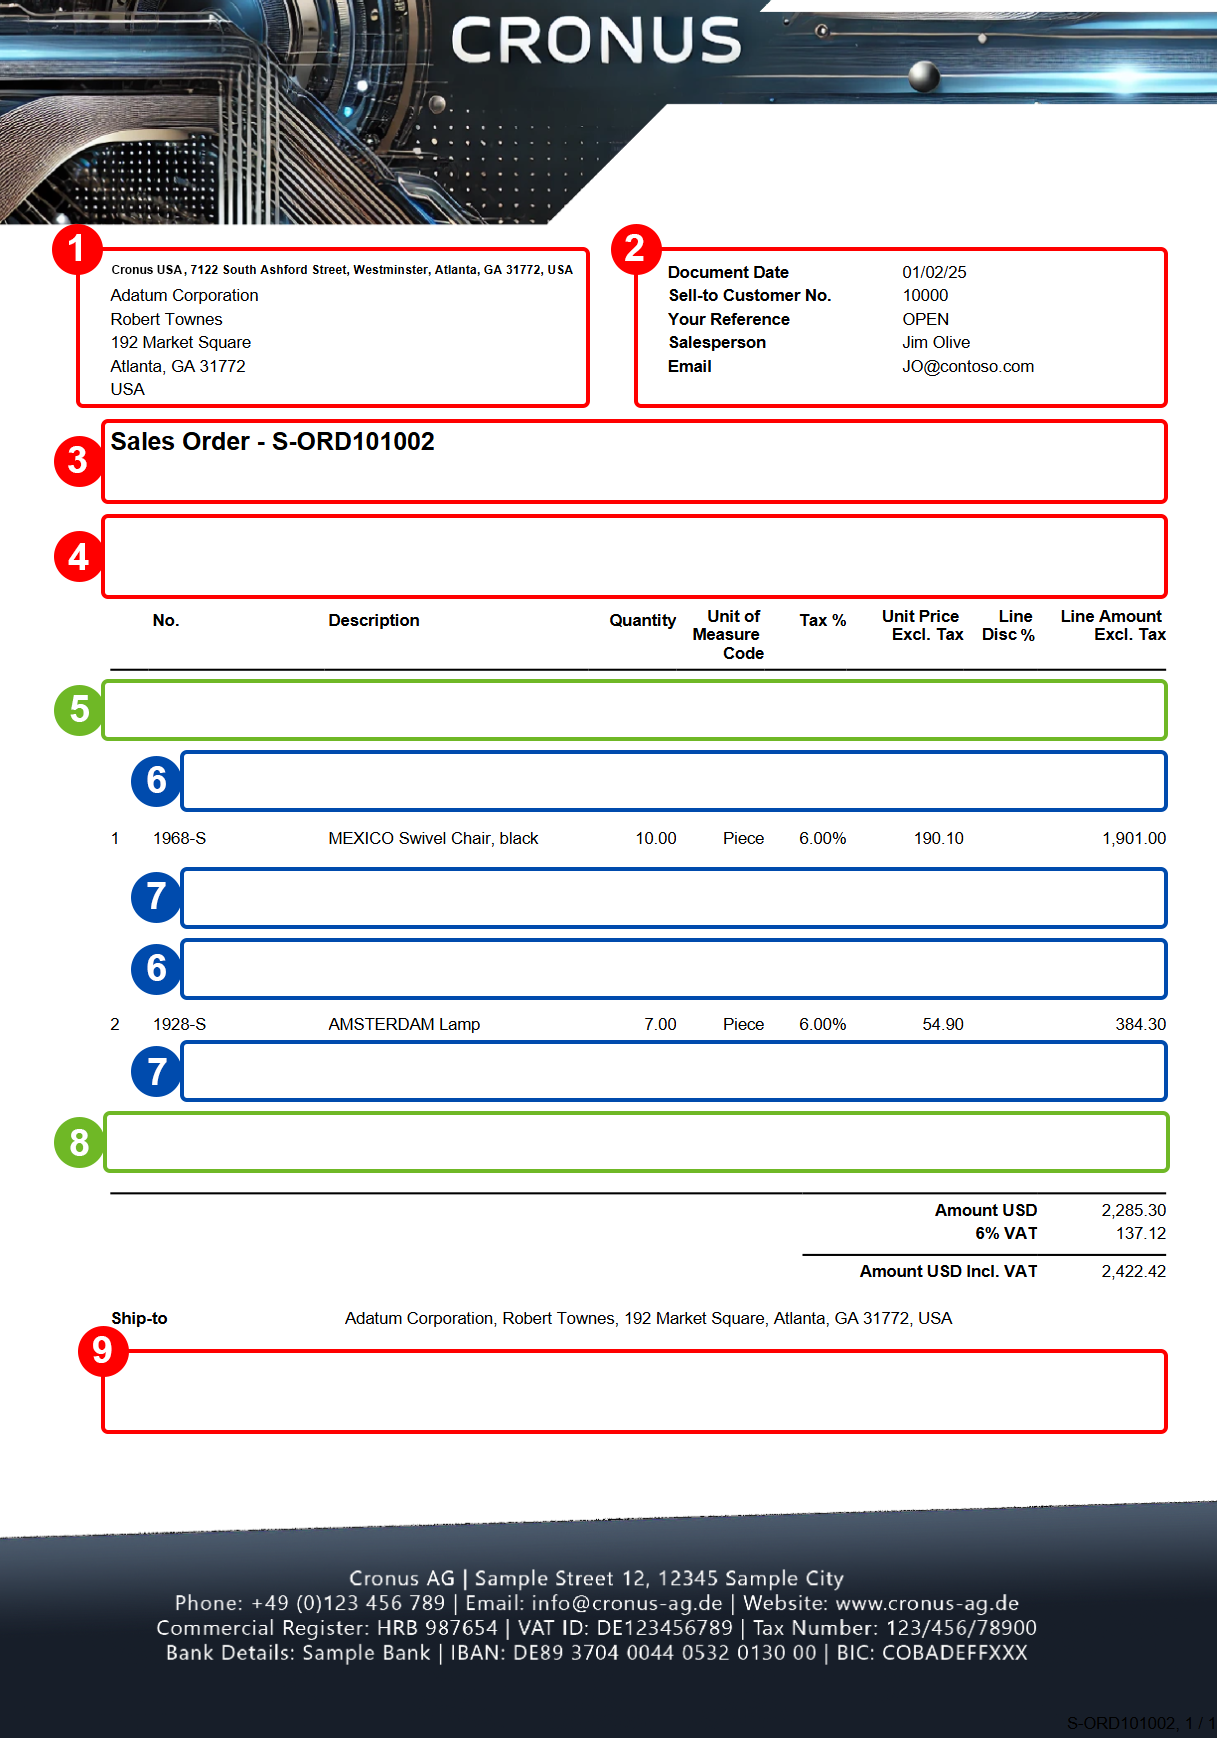
- Under the Fields tab, select the layout area to which you want to add the linked field. In the following screenshot, you can identify the individual layout areas by number.
- 1: Top Left: This layout area is located at the top left of the report and is primarily used as the address area. For more information on setting the address, please refer to the section Edit Report Address Format.
- 2: Top Right: This layout area is located at the top right of the report and is primarily used to display additional information relevant to the report.
- 3: Top: This layout area is located in the report below the address area and the report information.
- 4: Top Columns: This layout area is located in the report above the column headers for the report lines.
- 5: Before Lines: *This layout area is located before all report lines.
- 6: Before Line: This layout area is located before each report line. Please note that this layout area is repeated per line.
- 7: After Line: This layout area is located after each report line. Please note that this layout area is repeated per line.
- 8: After Lines: This layout area is located after all report lines.
- 9: Bottom: This layout area is located at the bottom of the report.
Other selectable areas such as Line, Totals and VAT Specification are reserved by the system and cannot be edited. If you want to hide the VAT Specification report area, you will find the corresponding setting in the Define Print Settings section.
- In our example, we select the layout area By line (7).
- To print the field values Lot Number and the corresponding quantity from this lot for the item in the sales shipment, select the Linked Field option in the Type column.
- Under the Table ID column, select the value 32 (Item Ledger Entry).

- In the No. column, select the value 12 (quantity).
- In the No. of Links column, click on the underscore _.
- The Report Field Links window is displayed.

- Under the Field ID column, select the value 2 (item no.).
- In the same line, select the value 6 (No.) under the Header Field ID column.
- Select the value 6 (Document No.) in a new line under the Field ID column.
- In the same line, select the value 3 (Document No.) under the Header field ID column.

- Close the Report Field Links window.
- Deactivate the Print Caption checkbox for the created line with the value Related field.
- Select the Additional Fields option from the Fields tab in the menu bar.
- The Additional Report Fields window is displayed.
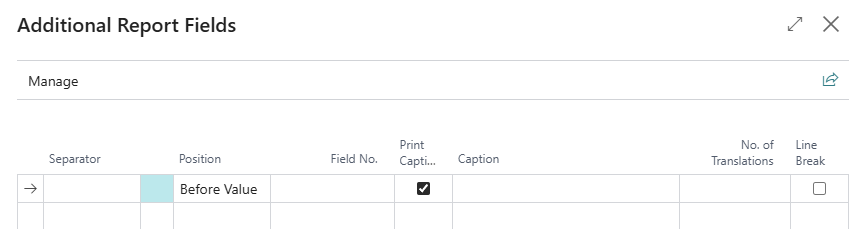
- Select the value 6501 (Lot No.) under the Field No. column.
- Enter the value Lot Info under the Caption column.
- Enter the value Quantity: in the second line under the Caption column.
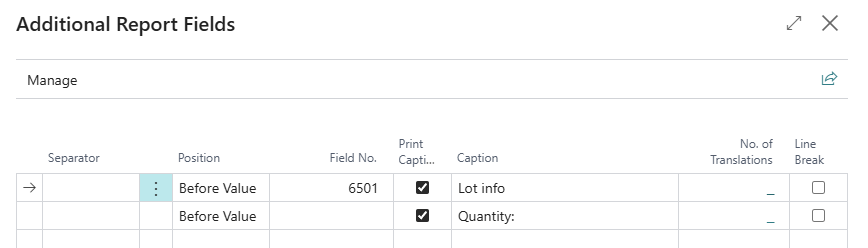
- Close the Additional Report Fields window.
In the report preview, all lot numbers used and the corresponding quantities from the lot are displayed below the item.