Change Serial Number
This chapter describes how to change a serial number of a service item.
To change the serial number of a service item, proceed as follows:
- Open the search function from the role center (ALT+Q).
- Search for Service Items and click on the corresponding search result.
- The Service Items list is displayed.
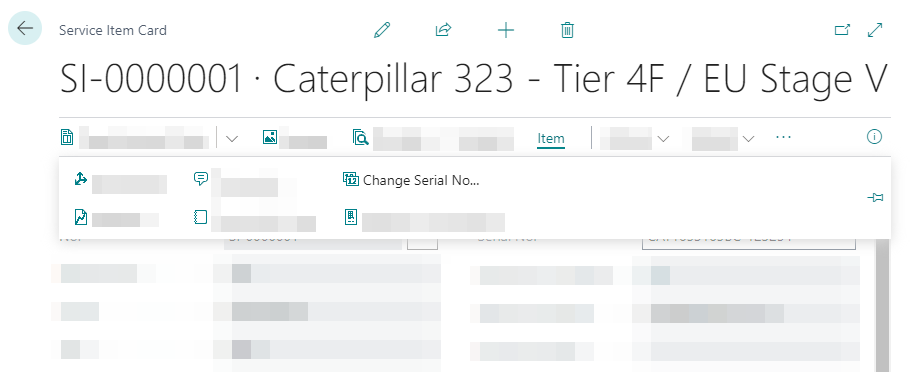
- Open the service item card for the service item for which you want to change the serial number.
- In the menu bar, click Item > Change Serial No.….
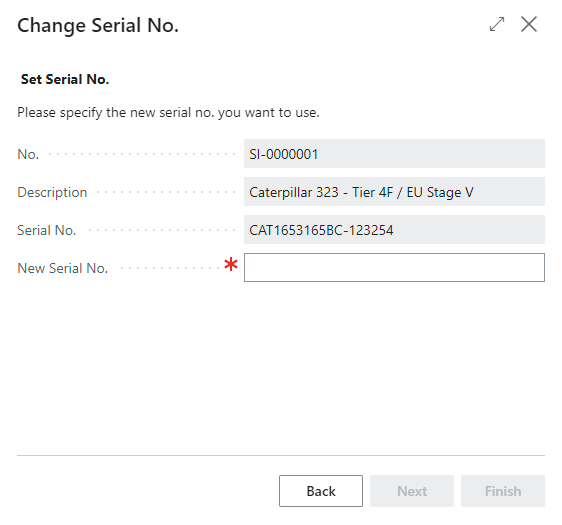
- The wizard for changing the serial number is displayed. This wizard guides you through the process step by step.
- Click Next.
- Specify the new serial number for the service item.
- Click Next. The next window shows you the changes that will be made when you change the serial number.
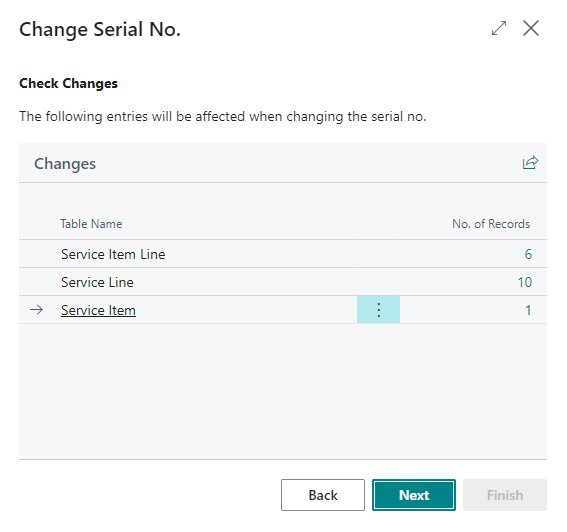
- To check the changes made to the records, click the digit in the No. of Records column.
- Click Next.
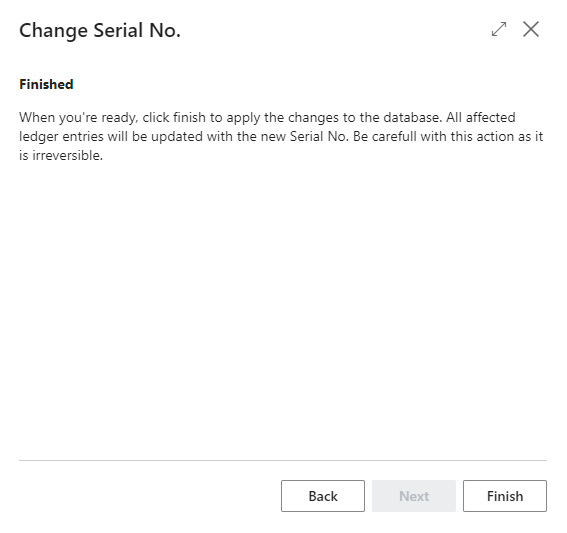
- Please note that the serial number change cannot be undone. All affected items will be updated with the new serial number. Click Finish.
- You will be asked if you really want to change the serial number. Confirm the dialog with Yes.
- A process window shows you the status of the serial number change. If few items are affected by changes, this window will only be displayed for a few seconds.
You have changed the serial number of a service item (including all documents associated with that service item).