Create Cue with Percentage Value
This chapter describes how to create a cue with a percentage value. The calculation of the cue is based on two basic cues that together form a fraction. The first cue is the numerator and the second cue is the denominator. The result of this division is multiplied by 100 and displayed as a percentage value on the cue.
An example of a simple percentage cue for your role center would be the quote success rate in your company. By quote success rate, we mean the number of sales quotes that were successfully converted into sales orders. The following describes how to create this percentage cue for your evaluation in the role center.
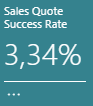
A total of three cues must be created for the setup:
- Create Cue for Sales Quotes
- Create Cue for Sales Quotes with status "Released"
- Create Cue for Sales Quote Success Rate
Note
Permissions required
It is only possible for certain users to create a cue. You must have the BYD CU ADMIN or SUPER permission set. For more information on how to assign the BYD CU ADMIN permission set to a user, refer to the section Assign admin permissions for Beyond Cues.
Note
Automatic font color adjustment
The font color of the cue is automatically selected based on the color of the cue. For example, if you create a black cue, the system will select white font. If the cue color is white, a black cue font will be used accordingly. In this way, the Beyond Cues app ensures optimal readability of the cues.
Create Cue for Sales Quotes
This section describes how to create a cue for the number of all sales quotes. The cue created using this description is used as a counter in the calculation of the offer success rate.
To create the cue for the number of all sales quotes, proceed as follows:
- Open the search function from the roll center (ALT+Q).
- Search for Beyond Cues and click on the corresponding search result.
- The Beyond Cues page is displayed. On this page, you will find all configured cues.
- Click New in the menu bar. The Cue card is displayed.

- Under the General tab, enter a code for the cue in the Code input field.
- Enter a title for the cue in the Title input field.
- Under Group code, select an display group or create a new group.
- Enter a value in the Sorting No. field to define the order of cues within the selected group.
- You can define the width of the cue using the values in the Width field.
- Under the Update Interval field, specify a time interval in minutes that will be used to update the cue.
- Select the color for the cue in the Color field.
- Select a suitable icon for your cue from the icons.
- Under the Calculation tab, select the Count option in the Type field.
- Under Table Name, specify the table you want to use for the cue (for example, ID 36 for sales header). Click in the field to open the Table Lookup window, from which you can select the table.
- Under the Table Key field, you can optionally define whether the data should be sorted using an available primary or secondary key. Click the number in the field to select from the available keys for this table. Specifying a key reduces the loading times of the cue data and thus contributes to better system performance.
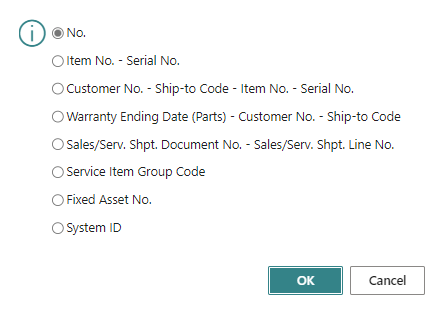
- Use the Descending slider to sort the order ascending or descending based on the key.
- Open the dropdown menu for the Table Filter Code field.
- Erstellen Sie einen neuen Filter, klicken Sie im Kontextmenü auf Neu.
- Das Fenster Auswählen - Tabellenfilter wird angezeigt.
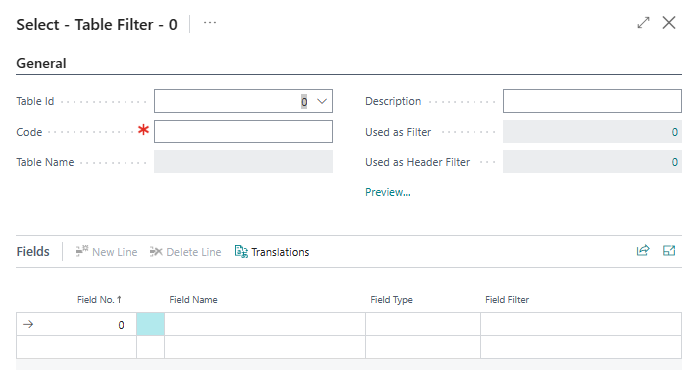
- Geben Sie im Feld Code einen Code für den Tabellenfilter an.
- Geben Sie im Feld Beschreibung eine Beschreibung für den Tabellenfilter an.
- Unter dem Bereich Felder können Sie nach Feldwerten filtern, die auf die ausgewählte Tabelle angewendet werden sollen. In diesem Beispiel möchten wir nach der Belegart Angebot filtern. Klicken Sie unter der Spalte Feldnr. auf das Dropdownmenü und wählen Sie aus der Liste das Feld Belegart (ID: 1) aus.
- Definieren Sie unter der Spalte Feldfilter den Wert Angebot.
- Schließen Sie das Fenster Tabellenfilter und kehren Sie zur Stapelkarte zurück.
Sie haben einen Stapel estellt, der alle Verkaufsangebote im System zählt.
Create Cue for Sales Quotes with status "Released"
In diesem Abschnitt wird beschrieben, wie Sie einen Stapel für Verkaufsangebote mit Status "Freigegeben" erstellen. Der über diese Beschreibung erstellte Stapel wird als Nenner in der Berechnung der Angebots-Erfolgsquote verwendet.
Um den Stapel für die Anzahl der Verkaufsangebote mit dem Status Freigegeben zu erstellen, gehen Sie wie folgt vor:
- Open the search function from the roll center (ALT+Q).
- Search for Beyond Cues and click on the corresponding search result.
- The Beyond Cues page is displayed. On this page, you will find all configured cues.
- Click New in the menu bar. The Cue card is displayed.
- Under the General tab, enter a code for the cue in the Code input field.
- Enter a title for the cue in the Title input field.
- Under Group code, select an display group or create a new group.
- Enter a value in the Sorting No. field to define the order of cues within the selected group.
- You can define the width of the cue using the values in the Width field.
- Under the Update Interval field, specify a time interval in minutes that will be used to update the cue.
- Select the color for the cue in the Color field.
- Select a suitable icon for your cue from the icons.
- Under the Calculation tab, select the Count option in the Type field.
- Under Table Name, specify the table you want to use for the cue (for example, ID 36 for sales header). Click in the field to open the Table Lookup window, from which you can select the table.
- Under the Table Key field, you can optionally define whether the data should be sorted using an available primary or secondary key. Click the number in the field to select from the available keys for this table. Specifying a key reduces the loading times of the cue data and thus contributes to better system performance.
- Use the Descending slider to sort the order ascending or descending based on the key.
- Open the dropdown menu for the Table Filter Code field.
- Erstellen Sie einen neuen Filter, klicken Sie im Kontextmenü auf Neu.
- Das Fenster Auswählen - Tabellenfilter wird angezeigt.
- Geben Sie im Feld Code einen Code für den Tabellenfilter an.
- Geben Sie im Feld Beschreibung eine Beschreibung für den Tabellenfilter an.
- Unter dem Bereich Felder können Sie nach Feldwerten filtern, die auf die ausgewählte Tabelle angewendet werden sollen. In diesem Beispiel möchten wir nach der Belegart Angebot filtern. Klicken Sie unter der Spalte Feldnr. auf das Dropdownmenü und wählen Sie aus der Liste das Feld Belegart (ID: 1) aus.
- Definieren Sie unter der Spalte Feldfilter den Wert Angebot.
- Fügen Sie als zweites Filterkriterium das Feld Status (ID: 120) hinzu und geben Sie als Feldfilter den Wert Freigegeben ein. Auf diese Art filtern Sie jetzt neben der Belegart Angebot zusätzlich noch nach dem Status Freigegeben.
- Schließen Sie das Fenster Tabellenfilter und kehren Sie zur Stapelkarte zurück.
Sie haben einen Stapel estellt, der alle Verkaufsangebote mit dem Status "Freigegeben" im System zählt.
Create Cue for Sales Quote Success Rate
This section describes how to create a cue for the sales quote success rate. The cue created using this description uses the cues created in the section Create Cue for Sales Quotes with status "Released" as the numerator and the cue created in the section Create Cue for Sales Quotes as the denominator for calculating the quote success rate.
To create the cue for the percentage sales quote success rate, proceed as follows:
- Open the search function from the roll center (ALT+Q).
- Search for Beyond Cues and click on the corresponding search result.
- The Beyond Cues page is displayed. On this page, you will find all configured cues.
- Click New in the menu bar. The Cue card is displayed.
- Under the General tab, enter a code for the cue in the Code input field.
- Enter a title for the cue in the Title input field.
- Under Group code, select an display group or create a new group.
- Enter a value in the Sorting No. field to define the order of cues within the selected group.
- You can define the width of the cue using the values in the Width field.
- Under the Update Interval field, specify a time interval in minutes that will be used to update the cue.
- Select the color for the cue in the Color field.
- Select a suitable icon for your cue from the icons.
- Under the Calculation tab, select the Percent Of option in the Type field.
- In the Cue 1 field, specify the cue created in the section Create Cue for Sales Quotes with status "Released".
- In the Cue 2 field, specify the cue created in the section Create Cue for Sales Quotes.
You have created the cue for the sales quote success rate.